Sticker Tutorial
If you are like many of us in the
filofax community, you will continually see really cool stuff you can make or
even others sell that you wish you could make!
If you have the time, a word program and patience you can create
anything! (Ok ok…a printer and paper may
be a huge help, too!)
So here is a step by step walk
through on how I created stickers in my ancient program. And mine is ancient…seriously 2007 word
program ancient…I also use Open Office and find it’s just as easy to use
for FREE!
Ok now enough about that…on to the
tutorial.
Items needed:
Your word program, or
even your art program, card making program…this can be done in ANY program that
offer “symbols, shapes, smart art”, etc.
In your program: In your page layout :
set your margins
I set my margins on ALL
projects to the smallest possible. (In
my word program that is .2 all around except on the bottom margin that seems to
adjust to .21)
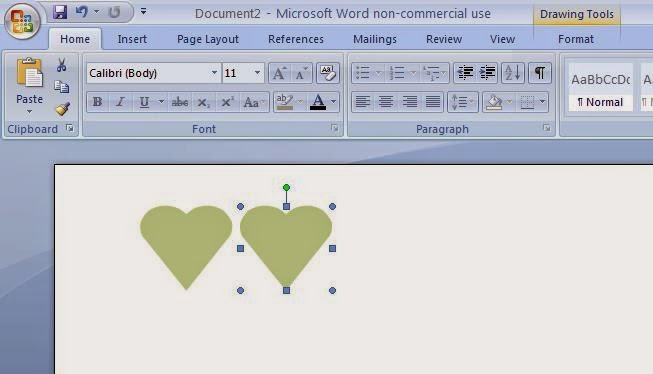
Now I go to where my symbols are :
After choosing my symbol, I then use
the format feature to color it, the inside and outside of the shape. You can even use the pattern and picture feature to put anything inside of your shape!
Then all you need to do to repeat this pattern, is copy and paste!
Then copy the completed item
or go back and change the color to make a full sticker sheet!
Now when it comes to some...it may take more than that.
For some programs that haven’t the
current fad of the box flag
Choose a regular rectangle
Color it in and then add a "chevron" shape
Adjust the color to match!
Add to either end for either
an arrow or box flag…or both ends for a flag arrow!
To add words
Use text box! Or even word art!
I like text box for straight, and word art if I need a curve in it.
You can make the text box directly over your flag!
Change the font and size in your font area, mine is in the "home" tab.
(PS I made the peach flag to show you how they overlay to create the flag as well.)
JUST AN FYI :
Once
you have your word inside you'd like to use...change the shape fill and
outline fill to NO fill. This makes it transparent and able to move to
wherever you like! It also helps if the font is too large for the word
box but will still fit if you move it around and adjust it. Usually
for those edge to edge fonts or for when you are layering words.
Also
when making flags in ancient programs like mine...you have to
copy/paste ALL pieces of the flag before adding words. Line those
suckers up and you just made a sticker sheet!
You can then write in ANY
shape…or use a doodle or wingding fonts!
Now for printing:
Always change your print properties!
Even if you are keeping it on
plain paper or changing it to a more photo worthy paper ALWAYS change your print
quality to HIGH…this makes sure you haven’t any gradient not intended in color through
the entire print. If you notice when you
print at times a discoloration or not full coverage, it’s print quality that
does this.
There you are! Now you can print all
those cute designs you see or create your own projects or get gutsy and sell your own stickers!


No comments:
Post a Comment